Paint Bathroom Cabinets: A Complete Ottawa DIY Guide

Yes — you can paint bathroom cabinets yourself and get a durable, furniture-like finish. The key is not the paint brand you choose; it’s the sequence you follow. Skip the degreasing step or rush the cure time, and even the best cabinet enamel will peel within months. Do it right, and your vanity can look factory-finished for years.
What guarantees a lasting result:
Degrease thoroughly before any sanding or priming
Sand with medium grit (120) then fine grit (220) for proper adhesion
Apply a waterborne bonding primer like Zinsser STIX before any topcoat
Use a cabinet-grade waterborne alkyd or enamel (two coats minimum)
Allow full cure before heavy daily use
Project time estimate: a few hours of active work across multiple days, plus a cure period before the finish reaches full hardness.
Key Takeaways
Proper prep, the right bonding primer, and a cabinet-grade waterborne alkyd or enamel are the three factors that determine whether a bathroom cabinet refinish lasts years or fails within months.
Point | Details |
Prep is non-negotiable | Degrease with TSP substitute and sand with 120-grit then 220-grit before any primer goes on. |
Use a bonding primer | Zinsser STIX Waterborne Bonding Primer is recommended for wood, laminate, and previously painted surfaces. |
Choose cabinet-grade paint | Benjamin Moore ADVANCE®, BEHR Cabinet & Trim Enamel, or Valspar Oil Enriched Enamel in satin or semi-gloss. |
Allow full cure time | Wait 30 days after the final coat before reattaching hardware and resuming normal daily use. |
Ottawacabinetpainting for pro results | For spray-quality finishes, complex layouts, or a 6-year warranty, Ottawacabinetpainting handles the full process in Ottawa. |
Table of Contents
What supplies do you need to paint bathroom cabinets in Ottawa?
How to paint bathroom cabinets: the full step-by-step process
How do you paint laminate, thermofoil, or previously stained cabinets?
How do you fix brush marks, drips, and peeling on painted cabinets?
When should Ottawa homeowners call a professional cabinet painter?
Our perspective on what actually makes a bathroom cabinet refinish last
What supplies do you need to paint bathroom cabinets in Ottawa?
Before you open a single can, having everything on hand saves you from stopping mid-project. Here’s a complete shopping list with Canada-available brands, most of which you’ll find at Home Depot Canada or at your local Benjamin Moore dealer.
Cleaners and degreasers
TSP substitute (trisodium phosphate alternative) or a dedicated cabinet degreaser
Clean rags or lint-free cloths
Sandpaper
120-grit sheets or sponges (medium, for scuffing the existing finish)
220-grit sheets (fine, for smoothing between coats)
Sanding block for flat surfaces
Primers
Zinsser STIX Waterborne Bonding Primer — the go-to for most wood, laminate, and previously painted surfaces; available at Home Depot Canada. Benjamin Moore’s Canadian how-to specifically recommends STIX for adhesion before ADVANCE® topcoat.
Shellac-based primer (Zinsser BIN) — for heavily stained wood, tannin bleed, or surfaces where waterborne primer raises grain badly
Oil-based primer — an alternative for raw or stripped wood when maximum adhesion is needed
Topcoat paints (Canada-available)
Benjamin Moore ADVANCE® Waterborne Interior Alkyd — levels beautifully, resists brush marks, and cleans up with water. Satin or semi-gloss finish.
Benjamin Moore Aura® Bath & Spa — formulated specifically for high-humidity spaces with a mildew-resistant coating; a strong choice for bathrooms with poor ventilation.
BEHR Premium Interior Cabinet & Trim Enamel — available in satin and semi-gloss, with explicit brush, roller, and airless sprayer guidance from BEHR Pro Canada.
Valspar® Cabinet, Door & Trim Oil Enriched Enamel — known for its flow and leveling and brush-mark resistance; good for DIYers who want an oil-enriched finish without full oil-based cleanup.
Why satin or semi-gloss? Both sheens resist moisture and wipe clean easily, which matters in a bathroom. Flat or eggshell finishes absorb humidity and show water marks. Understanding sheen performance and durability helps explain why cabinet-grade enamels consistently recommend these two options.
Application tools
2" angled sash brush (for edges, frames, and detail areas)
4" foam or microfiber mini roller (for flat door panels)
Spray gun or aerosol primer (optional, for hardware)
Protection and hardware supplies
Drop cloths or plastic sheeting
Painter’s tape (ScotchBlue or FrogTape)
Small zip-lock bags and a marker (for labeling hardware)
Screwdriver or drill for removing hinges and pulls
How to paint bathroom cabinets: the full step-by-step process
Follow this sequence exactly. Skipping or reordering steps is the most common reason a DIY cabinet refinish fails within the first year. Sherwin-Williams’ project guidance and Benjamin Moore’s Canadian how-to both reinforce this same order.
Set up your workspace. Lay drop cloths on the floor and countertop. Open a window or run the bathroom fan — ventilation matters for both drying times and your health.
Remove doors, drawers, and hardware. Take off every door and drawer front. As you remove each hinge, pull, and knob, drop the hardware into a labeled zip-lock bag. Mark the bag with the door’s location (e.g., “upper left”). This step saves real time during reassembly.
Clean and degrease all surfaces. Wipe every surface with a TSP substitute or cabinet degreaser. Bathrooms accumulate hairspray, hand lotion, and soap film — all of which prevent primer from bonding. Let surfaces dry completely before moving on.
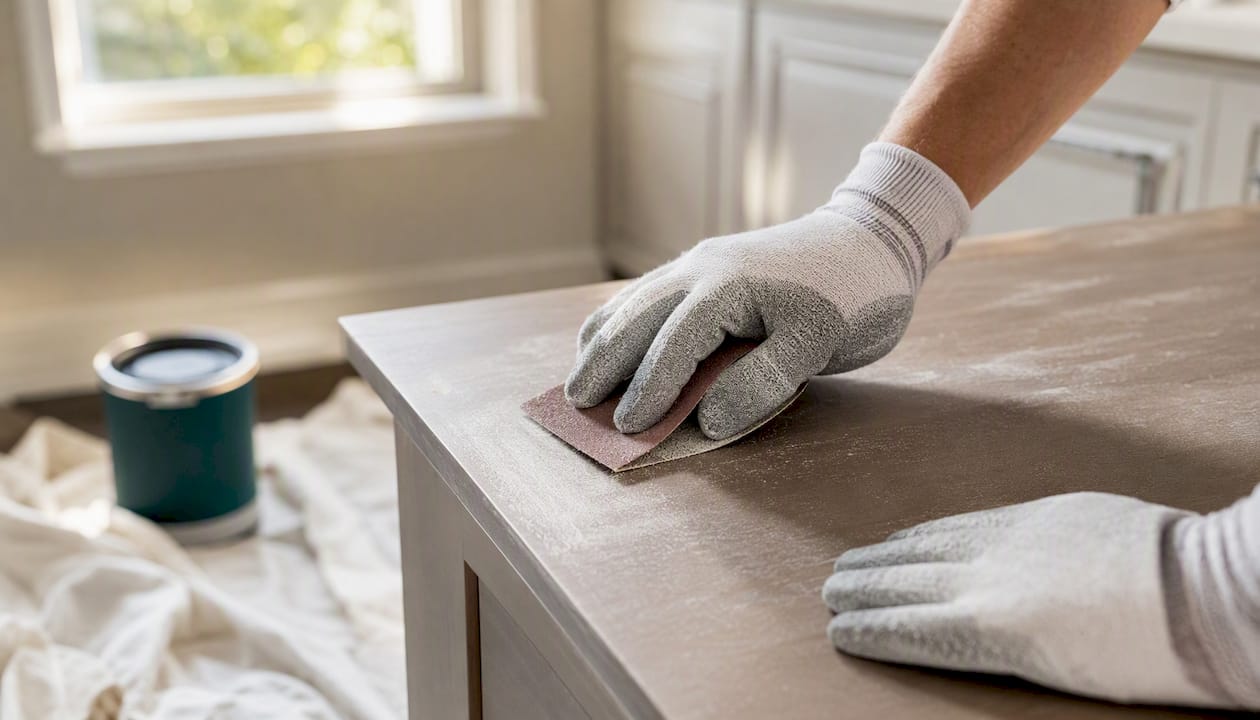
Sand with 120-grit (medium). Scuff the entire surface to break the sheen of the existing finish. You’re not trying to strip the cabinet; you’re creating mechanical adhesion for the primer. Sand with the grain on wood surfaces.
Sand with 220-grit (fine). Follow up with fine-grit paper to smooth out any scratches left by the 120-grit pass. This is what separates a smooth finish from a rough one.
Remove all dust. Wipe surfaces with a tack cloth or a damp lint-free rag. Let dry. Any dust left behind will show through the primer and every coat after it.
Apply primer. Brush primer onto edges and detail areas first, then roll flat panels with a 4" foam roller. For most bathroom vanities, one coat of STIX Waterborne Bonding Primer is enough. Going from a dark color to a significantly lighter one? Apply two coats of primer — manufacturer guidance consistently recommends this to prevent bleed-through and uneven coverage.
Apply topcoat — first coat. Brush edges and profiles first, then roll the flat surfaces. Work in thin, even passes. Thin coats level better and dry faster than thick ones.
Lightly sand between coats with 220-grit. A quick pass knocks down any dust nibs or texture. Wipe clean before the second coat.
Apply topcoat — second coat. Same technique as the first. Two coats is the standard minimum for cabinet-grade enamels.
Allow proper dry and cure time before reassembly.
Sanding grit reference
Grit | Type | When to use |
120 | Medium | Initial scuff-sanding to break the existing finish |
220 | Fine | Between primer and topcoat; between topcoat layers |
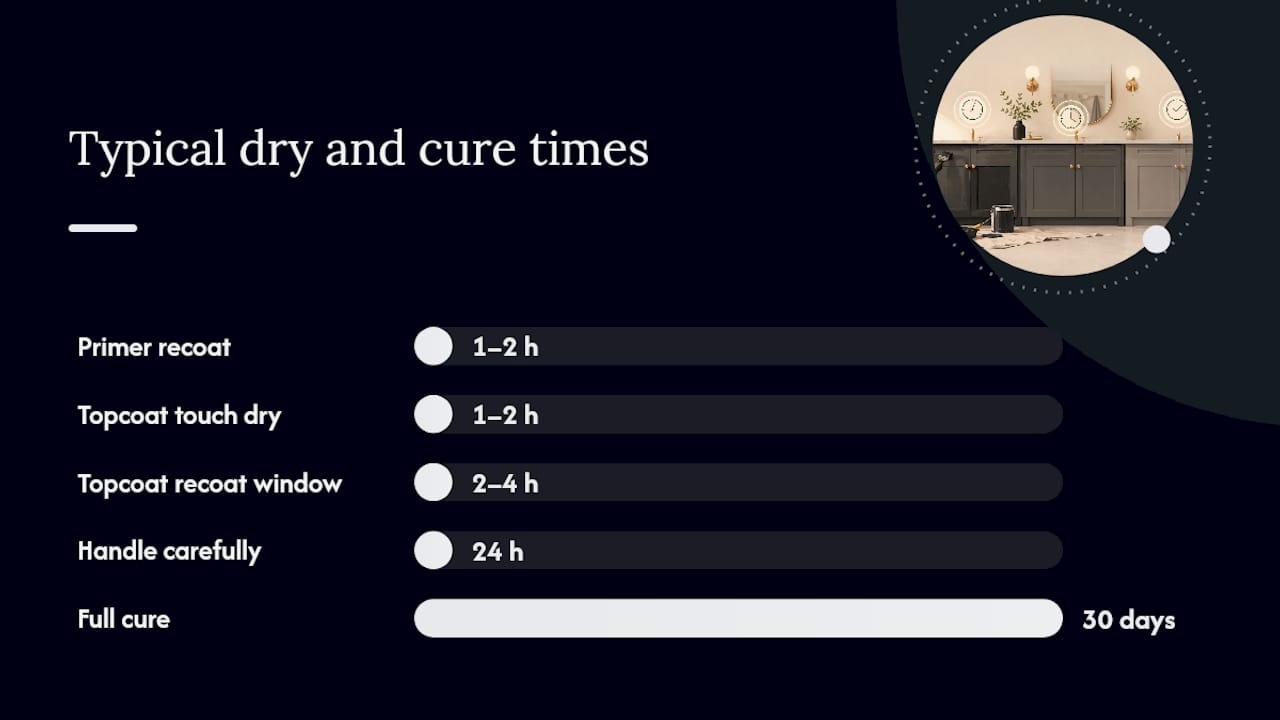
Dry, recoat, and cure times
Stage | Typical timeframe |
Primer: recoat | 1–2 hours (waterborne bonding primer) |
Topcoat: touch dry | 1–2 hours |
Topcoat: recoat window | 2–4 hours (check your specific product label) |
Handle carefully | 24 hours after final coat |
Full cure (daily use) | 30 days |
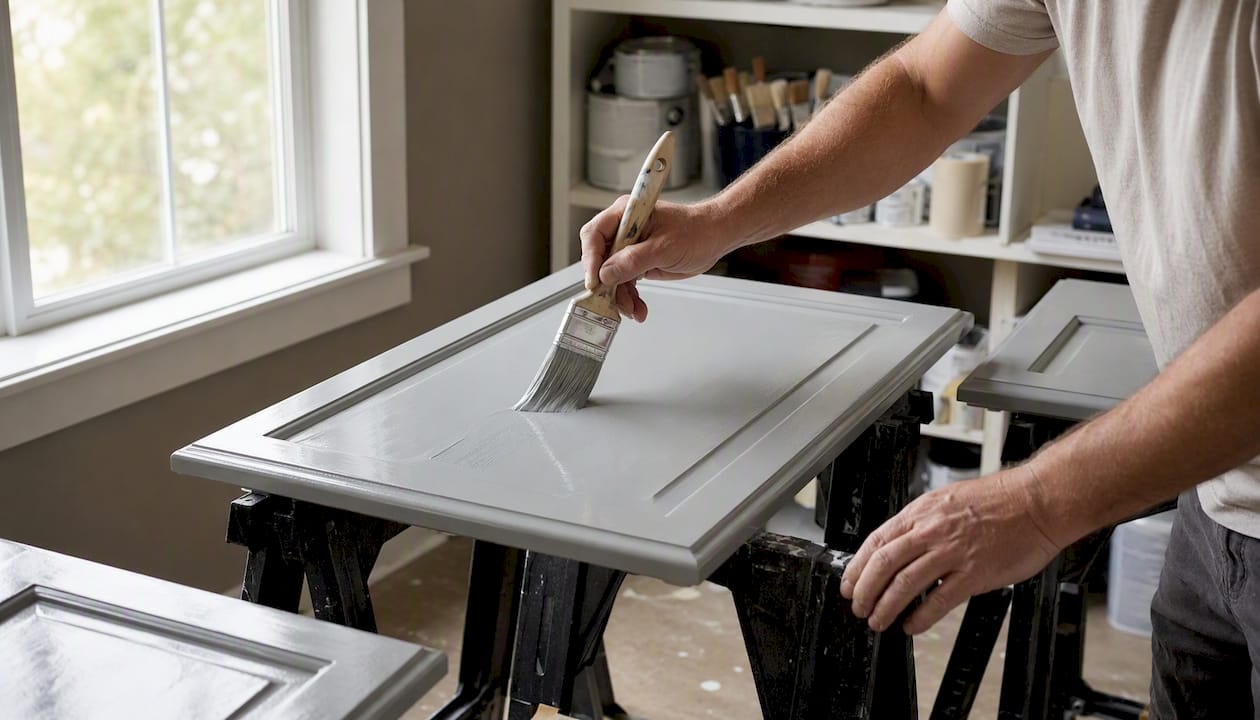
Pro Tip: Lay door panels flat on sawhorses while painting rather than hanging them vertically. This helps prevent runs and sags, letting the paint level smoothly for a factory-finished look.
For spray application, an airless sprayer set to a fine tip (typically 0.011–0.013 inches) works well for cabinet doors. If you’re new to spraying, practice on cardboard first — drips from a sprayer are harder to fix than brush marks.
How do you paint laminate, thermofoil, or previously stained cabinets?
Not every bathroom vanity is raw wood, and the surface type changes your prep approach. The good news: most surfaces can be painted successfully. What changes is how much prep work you do before the primer goes on.
Laminate and thermofoil cabinets can absolutely be painted, but adhesion is the challenge. Laminate is a non-porous surface, so standard primers don’t grip it the way they grip wood. The fix is straightforward: scuff-sand with 120-grit to create texture, then apply a dedicated bonding primer like Zinsser STIX. Before committing to the full project, do a quick adhesion test — apply a small patch of primer to an inconspicuous area, let it cure for 24 hours, then try to peel it with your fingernail. If it holds firmly, you’re good to proceed. For more detail on this process, the guide on painting laminate cabinets covers the adhesion steps thoroughly.
Thermofoil that is already peeling or blistering at the edges is a different situation. Painting over lifting thermofoil traps moisture underneath and will cause the new finish to bubble. In that case, either remove the thermofoil entirely before painting or consider whether replacement makes more sense than refinishing.
Previously stained or varnished wood is one of the most common scenarios in older Ottawa homes. You have three options:
Sand and prime: If the stain or varnish is in good condition (no peeling, no flaking), a thorough 120-grit scuff followed by a shellac-based primer (Zinsser BIN) blocks tannin bleed and gives the topcoat a clean base.
Strip and prime: If the finish is failing or you’re going significantly lighter in color, stripping down to bare wood and starting fresh gives the most predictable result.
Skip shellac at your own risk: Using a waterborne bonding primer over a heavily tannin-rich wood like oak without a shellac barrier can cause yellow or brown bleed-through in the topcoat. Shellac primer adds one step but prevents a full repaint.
Metal hardware is worth refinishing rather than replacing in most cases. Remove pulls and hinges, clean them with a degreaser, scuff lightly with fine steel wool, and apply a spray-on metal primer followed by a spray enamel in your chosen finish. Home Depot Canada’s vanity how-to recommends spray-painting hardware as an efficient option that ties the whole vanity together.
Pro Tip: For laminate surfaces, use a liquid deglosser (like Wilbond or a TSP substitute) in addition to scuff-sanding. The combination of chemical deglossing and mechanical abrasion gives bonding primers the best possible grip on non-porous surfaces.
How do you fix brush marks, drips, and peeling on painted cabinets?
Even careful painters run into problems. Here’s how to diagnose and fix the most common ones before they become permanent.
Visible brush marks: Usually caused by applying too thick a coat or using a low-quality brush. Let the coat dry fully, sand lightly with 220-grit, wipe clean, and reapply a thinner coat. A 4" foam roller on flat panels eliminates most brush texture on those surfaces.
Orange peel texture: Common with spray application when the gun is held too far from the surface or the paint is too thick. Sand back with 220-grit and respray with the gun closer (8–10 inches) and at a slightly higher pressure.
Runs and drips: The result of too much paint in one pass. Let the drip dry completely — trying to wipe wet paint spreads it further. Once dry, sand the drip flat with 220-grit, feather the edges, and recoat.
Poor adhesion or peeling: This almost always traces back to inadequate prep. If paint is peeling within weeks of application, the surface wasn’t degreased properly or the wrong primer was used. Strip back to bare surface, degrease thoroughly, and start the primer sequence again. Sherwin-Williams’ preparation guidance emphasizes that adhesion failures are a prep problem, not a paint problem.
Mildew appearing on the finish: Bathrooms with poor ventilation are prone to mildew growth even on painted surfaces. Benjamin Moore’s Aura Bath & Spa includes a mildew-resistant formulation specifically for this environment. If mildew is already present on the existing surface, clean it with a diluted bleach solution and let it dry completely before priming — painting over active mildew seals it in and guarantees it returns.
When to strip and restart vs. sand and recoat: if peeling covers more than a small patch or if the adhesion failure is widespread, sanding and recoating won’t hold. Strip back, identify the prep failure, and correct it before applying new primer.
Pro Tip: Run your bathroom exhaust fan during and after painting, and keep it running for at least 30 minutes after every shower for the first 30 days post-painting. Consistent ventilation is the single most effective way to prevent mildew and extend the life of your cabinet finish in Ottawa’s humid summers.
When should Ottawa homeowners call a professional cabinet painter?
DIY cabinet painting is genuinely achievable for most vanities. But there are situations where the time, skill, or equipment required tips the balance toward hiring a pro. Here’s how to make that call honestly.
Hire a professional when:
Your cabinets have water damage, swelling, or structural issues that need repair before painting
The thermofoil or laminate is blistering or delaminating in multiple areas
You want a spray-applied finish with zero brush or roller texture (this requires professional spray equipment and a controlled environment)
You’re working with a complex layout — multiple cabinets, tight spaces, or custom millwork that’s difficult to disassemble
You need the project completed within a tight timeline with minimal household disruption
You want a written warranty on the finished work
Decision checklist — signs that favor calling a pro:
Existing finish is peeling in multiple spots (widespread adhesion failure)
Cabinets are a dark color and you want a bright white or very light finish (requires multiple primer coats and precise technique)
You’ve attempted a DIY repaint before and weren’t satisfied with the result
You’re planning to sell the home and need a showroom-quality finish
You simply don’t have the time to allow proper cure periods between steps
What to expect from a reputable Ottawa cabinet painter:
A professional service typically completes a bathroom vanity project with minimal on-site disruption. Cabinet doors are often taken off-site for spray finishing in a controlled environment, which eliminates dust contamination and delivers a smoother result than in-home painting. A reputable local contractor should offer a warranty on their work — Ottawacabinetpainting backs its cabinet painting with a 6-year warranty, which reflects confidence in both the prep process and the materials used.
Ottawa’s climate adds a specific consideration: the city’s cold winters and humid summers create significant seasonal humidity swings that can stress paint adhesion on cabinets near exterior walls or poorly insulated vanity areas. Local professionals account for this in their product selection and application timing. For a realistic sense of what professional cabinet painting costs in Ottawa, the cost breakdown for Ottawa homeowners is worth reviewing before requesting quotes.
When getting quotes, ask specifically: What primer do you use on laminate surfaces? What topcoat do you apply, and what’s the recoat schedule? What does your warranty cover, and for how long? A contractor who can answer those questions clearly is one who actually follows a proper process.
Our perspective on what actually makes a bathroom cabinet refinish last
We’ve seen every variation of this project in Ottawa homes, and the pattern is consistent: the jobs that fail aren’t the ones where someone chose the wrong paint color. They’re the jobs where prep was rushed because it felt like the boring part.
Degreasing is the step most DIYers underestimate. A bathroom vanity collects invisible residue from hairspray, hand cream, and steam over years of use. That film is thin enough that you can’t see it, but thick enough to prevent primer from bonding. Spending an extra 20 minutes with a TSP substitute before you touch sandpaper is the difference between a finish that lasts three years and one that lasts ten.
The same logic applies to cure time. A cabinet that feels dry to the touch after 24 hours is not a cabinet that’s ready for daily use. Waterborne alkyds like ADVANCE® need the full cure period to reach their rated hardness. Reattach the hardware too early, and you’ll press permanent indentations into the finish the first time you grab a door handle.
We also want to be direct about one thing: not every bathroom vanity is a good DIY candidate. If the surface is compromised, if the layout is complex, or if you want a spray finish that genuinely looks factory-applied, the honest answer is that professional equipment and a controlled spray environment produce a result that’s difficult to replicate with a brush and roller at home. That’s not a criticism of DIY — it’s just an accurate description of what spray finishing requires.
Ottawa Cabinet Painting handles the hard part for you
Painting bathroom cabinets yourself is a real option for straightforward vanities in good condition. For everything else — blistering laminate, complex layouts, spray-quality finishes, or simply a project you want done right the first time without the prep work — Ottawacabinetpainting offers a done-for-you service built around the same process described in this guide, with professional spray equipment and premium materials.
What’s included: thorough surface prep and degreasing, Zinsser STIX bonding primer, cabinet-grade topcoats in your chosen color and sheen, spray application options for a smooth factory finish, and a 6-year warranty on the completed work. Cabinet doors are typically finished off-site to avoid dust contamination, keeping disruption in your home to a minimum.
To get a quote, have this information ready: the number of cabinet doors and drawers, the current surface material (wood, laminate, thermofoil), the existing finish color, and photos if possible. Then request a free cabinet painting quote to get a clear price for your specific vanity. You can also view before and after results from completed Ottawa projects to see the finish quality firsthand.
Sources
These manufacturer and retailer pages back up the techniques and product recommendations in this guide. Each one includes technical data sheets, drying times, and application instructions specific to the product.
Recommended
Comments