Painting Cabinets in Rental Properties: Ottawa Guide
- Axcell Painting

- 4 days ago
- 9 min read
TL;DR:
Painting cabinets in Ottawa rental properties offers a cost-effective way to upgrade kitchens without full remodeling, provided proper preparation and durable materials are used. Tenants must obtain written landlord permission before painting, and the process involves specific priming, high-quality enamel, and careful surface prep to ensure long-lasting results. Scheduling during tenant turnover and allowing full cure time are essential to prevent early failures and maintain property value.
Painting cabinets in rental properties is the most cost-effective way tenants and property managers in Ottawa can transform a dated kitchen without full replacement. Cabinet refinishing, the industry-standard term for this process, delivers a factory-finished look at a fraction of renovation costs. The catch is that durability, not just appearance, determines whether the project succeeds or fails across multiple tenant cycles. Get the permissions, materials, and prep right, and you have a finish that lasts years. Skip any of those steps, and you are looking at peeling paint and a security deposit dispute within 18 months.
What are the legal considerations before painting cabinets in Ottawa rentals?
Painting cabinets in rental properties is a property alteration, and that classification carries real legal weight in Ontario. Tenants must obtain written permission from their landlord before touching any cabinet surface. A verbal agreement is not enough. If the work is done without consent, the landlord can require restoration to the original condition at the tenant’s expense.
Here is what both parties should address in writing before any work begins:
Scope of work: Which cabinets are being painted, what color, and what finish.
Approved materials: Specify paint brands or grades to prevent tenants from using cheap wall paint.
Responsibility for restoration: Clarify whether the tenant must repaint to original color at move-out.
Who performs the work: DIY versus licensed professional, and whether the landlord requires a professional.
Timeline: When the work will be done, ideally during a turnover window.
Normal wear and tear under Ontario’s Residential Tenancies Act does not cover intentional alterations like cabinet painting. That distinction matters because landlords cannot deduct from a security deposit for normal wear, but they can for unauthorized modifications. A clear written agreement protects both sides.
Pro Tip: Propose the cabinet painting as a mutual benefit. Landlords in Ottawa’s competitive rental market often approve upgrades that increase property value, especially when the tenant agrees to use professional-grade materials and a licensed painter.
Cabinet painting projects typically take only 5 to 7 days versus 4 to 6 weeks for a full kitchen remodel, which means minimal disruption and faster turnover. That timeline argument alone often convinces landlords to approve the project.
What materials and tools are best for painting Ottawa rental cabinets?
The right paint for rental cabinets is not a standard wall paint. It is a cabinet-grade enamel, specifically a waterborne alkyd or urethane-modified alkyd formulation. These products are engineered to handle the 2,500 to 3,500 scrub cycles typical in rental kitchens. Standard latex paint fails under that kind of repeated cleaning, and the failure is not gradual. It is sudden, visible, and expensive to fix.

Product | Type | Best for rentals? | Cure time |
Benjamin Moore Advance | Waterborne alkyd | Yes, excellent self-leveling | Up to 30 days |
Sherwin-Williams Emerald | Urethane-modified alkyd | Yes, faster cure | Faster, better for turnovers |
Standard latex wall paint | Latex | No, fails quickly | N/A |
Flat or matte finish | Any base | No, traps grease | N/A |
Waterborne alkyds like Benjamin Moore Advance require up to 30 days to reach full hardness, while urethane-modified alkyds like Sherwin-Williams Emerald cure faster. For Ottawa landlords managing tight turnover windows, that cure time difference is a practical scheduling factor, not just a technical detail.
Finish sheen is equally important. Flat or matte finishes absorb grease and are nearly impossible to clean in a kitchen environment. Satin or semi-gloss finishes provide the right balance of scrub resistance and a clean, modern appearance. For rental properties, semi-gloss is the standard choice.
On the tools side, HVLP (high-volume, low-pressure) sprayers produce a non-porous, smooth surface that brushes and rollers simply cannot replicate. HVLP spraying avoids the microscopic textures left by rollers, which trap grease and accelerate paint failure. For edges and tight areas, a high-quality synthetic brush works well as a complement to spraying.
Pro Tip: Ottawa’s humidity, especially in spring and fall, affects paint curing. Apply cabinet paint when indoor humidity is below 50% and temperature is above 15°C (59°F) for best adhesion and cure results.
For a deeper look at durable cabinet paint options suited to rental environments, Ottawacabinetpainting has a dedicated resource covering industrial-strength formulations.
How to properly prepare Ottawa rental cabinets for painting
Surface preparation accounts for 80% of cabinet painting longevity. Even the best paint on the market performs poorly on a surface that has not been properly cleaned and scuffed. This is the step most DIY projects rush, and it is exactly why so many fail.
Follow this preparation sequence for reliable results:
Remove all hardware. Take off hinges, handles, and knobs. Leaving hardware in place leads to uneven paint edges and makes reinstallation difficult after painting.
Degrease thoroughly. Use a TSP (trisodium phosphate) substitute or a dedicated cabinet degreaser to remove cooking oils, grease, and grime. Ottawa kitchens accumulate significant grease buildup, and paint will not bond to a greasy surface under any circumstances.
Repair surface damage. Fill dents, scratches, and small holes with a lightweight wood filler. Sand flush once dry. Skipping this step means every imperfection shows through the final coat.
Scuff sand all surfaces. Use 120 to 150 grit sandpaper to create mechanical adhesion. You are not trying to strip the existing finish. You are roughing it up so the primer has something to grip.
Wipe down with a tack cloth. Remove all sanding dust before priming. Dust trapped under primer creates a gritty texture that telegraphs through topcoats.
Apply a bonding primer. Skipping primer is the most common cause of cabinet paint peeling in rental properties. Products like INSL-X Stix or Zinsser BIN create a permanent chemical bond with the cabinet surface, regardless of what the original finish was.
The importance of thorough prep work cannot be overstated. Ottawacabinetpainting’s process always begins with this foundation, because no amount of premium paint compensates for a poorly prepared surface.
Pro Tip: If the existing cabinets have a high-gloss factory finish, use a liquid deglosser like Wilbond in addition to sanding. This chemically etches the surface and dramatically improves primer adhesion without excessive sanding.
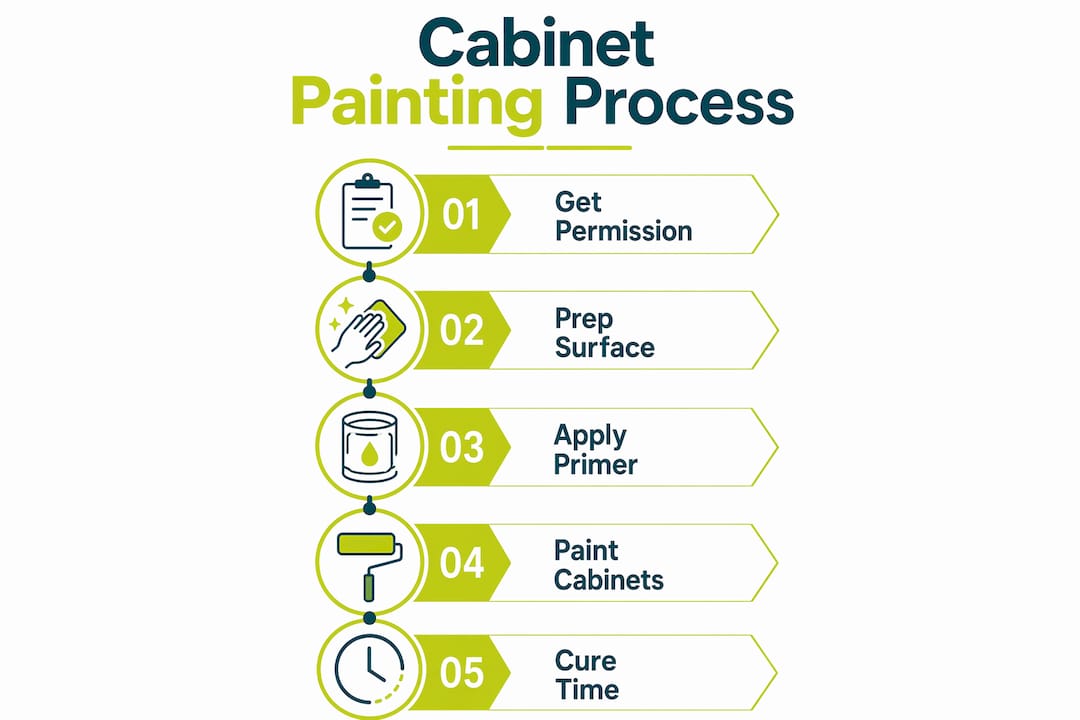
Step-by-step cabinet painting process for Ottawa rental properties
A professional cabinet refinishing process for rental properties follows a specific sequence that balances quality with the practical need to minimize downtime. Here is how the work flows from start to finish:
Remove cabinet doors and drawer fronts. Transport them off-site or to a clean, dust-free area for spraying. Off-site spraying in a controlled environment produces a factory-level finish that on-site work rarely matches.
Spray or brush the cabinet boxes. Apply the bonding primer first, then the topcoat in two to three thin coats. Thin coats prevent runs and avoid blocking, which is the term for cabinet doors sticking together when paint layers are too thick.
Allow proper dry time between coats. Each coat needs at least two to four hours of dry time before the next application. Rushing this step causes lifting and wrinkling.
Apply final topcoat and inspect. Check for drips, missed spots, and texture inconsistencies before the paint begins to cure.
Allow full cure before reinstalling. Paint dry time and cure time are distinct. A cabinet may feel dry within hours but requires up to 30 days to harden fully. Reinstall hardware only after the surface is firm to the touch, typically 48 to 72 hours after the final coat.
Reinstall hardware and doors. Adjust hinges for alignment. A freshly painted cabinet with misaligned doors undermines the entire visual result.
For scheduling, the best window for painting cabinets in a rental is during tenant turnover. The unit is vacant, there is no disruption to daily life, and the cabinets can cure without anyone using the kitchen.
Maintenance advice for tenants after painting is straightforward:
Avoid harsh chemical cleaners like bleach or ammonia-based products for at least 30 days after painting.
Use a soft cloth for cleaning, not abrasive scrubbing pads.
Report any chips or scratches to the property manager promptly so touch-ups can be done before moisture gets under the paint.
Common mistakes when updating cabinets in Ottawa rentals
60% of DIY cabinet painting projects fail within 18 months due to peeling or blocking, requiring costly rework that security deposit deductions rarely cover. The pattern is consistent: the wrong materials, rushed prep, and no understanding of cure time.
The most frequent mistakes include:
Using wall paint instead of cabinet-grade enamel. Wall paint is not formulated for the friction and cleaning cycles of a kitchen cabinet. It fails within months.
Skipping the bonding primer. Paint applied directly to a slick factory finish will peel. No exceptions.
Applying coats that are too thick. Thick coats cause blocking, where cabinet doors stick to the frame when closed. Once blocking occurs, the finish is compromised and often needs to be stripped and redone.
Not allowing full cure time. Tenants who clean cabinets aggressively within the first 30 days after painting will damage the finish, even if the paint looks and feels hard.
Using a roller on flat cabinet faces. Rollers leave a stippled texture that traps grease and looks unprofessional under direct light.
“Rental-grade paint is not a cheaper variant of standard paint. It is a high-performance coating specifically formulated to endure professional cleans and friction from diverse tenant lifestyles.” — Durable Cabinet Finish for Tenants
Pro Tip: If paint starts to peel at edges within the first six months, the cause is almost always inadequate degreasing or a missing bonding primer. A full strip and repaint is the only reliable fix. Spot patching over failed paint rarely holds.
For landlords considering whether to DIY or hire a professional, cost-effective kitchen updates are well documented as one of the highest-return improvements in rental properties. The math usually favors professional application when you factor in the cost of rework.
Key takeaways
Painting cabinets in rental properties succeeds only when professional-grade materials, thorough surface preparation, and proper cure time are all treated as non-negotiable requirements.
Point | Details |
Get written permission first | Document scope, materials, and restoration terms before any work begins. |
Use cabinet-grade enamel | Benjamin Moore Advance or Sherwin-Williams Emerald outperform standard latex in rental kitchens. |
Prep is 80% of the result | Degreasing, scuff sanding, and bonding primer determine whether paint lasts or peels. |
Respect cure time | Allow up to 30 days before aggressive cleaning to protect the finish. |
Schedule during turnover | Vacant units allow proper application and curing without disrupting tenants. |
What we have learned from painting rental cabinets in Ottawa
We have worked on rental properties across Ottawa long enough to know that the biggest mistake landlords make is treating cabinet painting as a quick fix rather than a proper refinishing project. The properties where cabinets look great after three or four tenant cycles are the ones where the landlord invested in the right primer, the right paint, and a professional application. The ones that call us back within a year almost always used a roller and a can of latex from a hardware store.
There is also a tenant retention angle that does not get enough attention. A kitchen with clean, modern-looking cabinets signals that a landlord maintains their property. Tenants notice that. In Ottawa’s rental market, where competition for quality tenants is real, a fresh cabinet finish is a low-cost signal of a well-managed property.
The agreement piece matters more than most people realize. We always recommend that landlords specify the exact paint product in the written approval. That one step prevents tenants from using the wrong product and eliminates disputes about quality at move-out. Clear expectations protect everyone.
If you are a property manager handling multiple units, consider building cabinet refinishing into your standard turnover checklist. A professional refinishing process done right lasts years, not months, and the cost per cycle drops significantly when you are not repainting every 18 months.
— Ottawa
Professional cabinet painting for Ottawa rental properties
Ottawacabinetpainting specializes in cabinet refinishing for rental properties across Ottawa, with a process built specifically for the durability demands of multi-tenant kitchens. We use HVLP spray application, cabinet-grade urethane enamels, and bonding primers on every project. Our typical turnaround fits within a standard vacancy window, so your unit is back on the market fast. We also back our work with a 6-year warranty, which means landlords are not calling us back for rework after the next tenant moves in. If you are ready to see what a factory-quality finish looks like on your rental cabinets, visit our rental cabinet painting services page or get a free spray painting quote today.
FAQ
Do tenants need permission to paint cabinets in Ottawa rentals?
Yes. Cabinet painting is a property alteration under Ontario’s Residential Tenancies Act, and tenants must obtain written landlord permission before proceeding. Without written consent, landlords can require full restoration at the tenant’s expense.
What is the best paint for rental kitchen cabinets?
Waterborne alkyds like Benjamin Moore Advance and urethane-modified alkyds like Sherwin-Williams Emerald are the best options. Both are formulated to handle the scrub cycles and chemical cleaners typical in rental kitchens, unlike standard latex wall paint.
How long does cabinet painting take in a rental property?
A professional cabinet refinishing project typically takes 2 to 5 days for application, but full cure time extends to up to 30 days. Scheduling during tenant turnover is the most practical approach to avoid disrupting kitchen use.
Why do DIY cabinet painting projects fail so quickly in rentals?
The most common causes are skipping bonding primer, using wall paint instead of cabinet-grade enamel, and not allowing full cure time before tenants clean the surface. These three errors account for the majority of early paint failures in rental kitchens.
Can landlords in Ottawa require tenants to repaint cabinets at move-out?
Yes, if the original written agreement specifies restoration to the original color or condition. Without that clause in writing, the obligation is unclear and difficult to enforce under Ontario tenancy law.
Recommended

Comments